Wednesday 28 October 2015

Easy Stenciling DIY

Hi there, here's a new tutorial, after a long break. Enjoy!
I recently had a stenciling craze and I realized it wasn't as hard as I thought. Before this, stenciling was very difficult, I did not have the right paint brush and paint always smudged under the stencil. Now I have found an easier way, and want to stencil on every thing. I use markers and plastic stencils. I have tried it on paper, cardboard and cloth so far. For the cloth you can use either fabric markers or wax crayons, then iron cloth between two wax papers on low heat (no steam).


For my stenciling on paper I use crayola washable markers (this means I can't touch it if my fingers are damp).
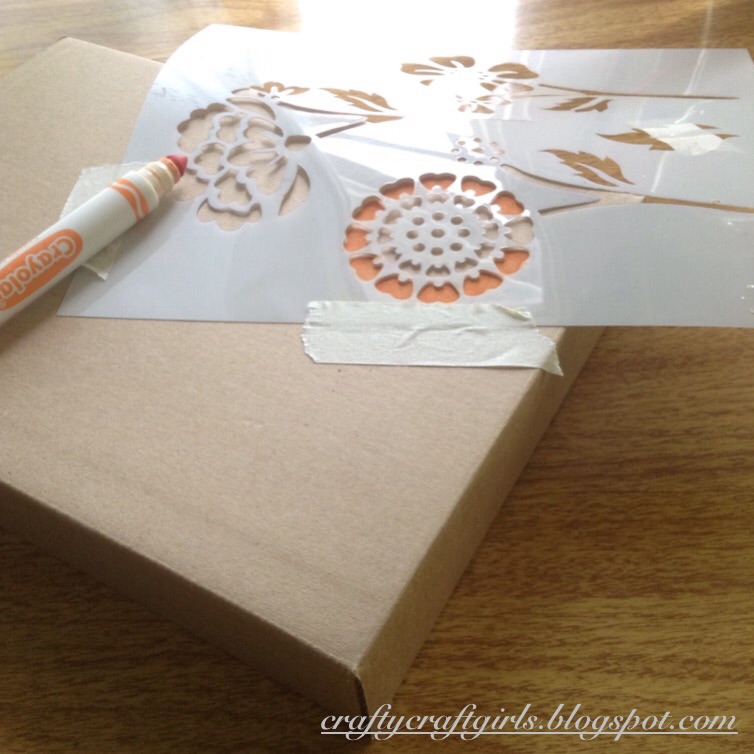
The method is shown in the photos below.


I tried this idea on some notebooks I made. I used a marker with a darker shade to the colour of the paper.


This is a cloth I decorated using the stencil and fabric markers (crayola).


Any new ideas, tips or comments will be accepted. Leave them below, we will love to hear from you!
HAPPY CRAFTING!!

Thursday 7 May 2015

How to cover a notebook

Hi,
Today I'm sharing a basic tutorial of how to cover a notebook using 11"x17" paper, tape and a pair of scissors.


Now you can decorate your notebook however you want!

HAPPY CRAFTING!!!

Cute Cushion Bag Tag

Hi, 
Today I want to share with you a tag design that I came up with. You can use it as a name tag or a gift tag. It is easy to make and looks especially cute on cloth bags and purses. All you need is cotton cloth or felt (because they do not shred when cut), needle and thread (preferable embroidery needle and thread), scissors, stuffing (wadding etc.) 


How to:

Cut two of the shapes you want your tag to be, like two hearts, stars, circles or squares etc. and a small piece of cloth for a backing.


Place the backing behind the cloth where you are going to embroider your name.


Now embroider your name


Sew the edge leaving a gap to push the stuffing in.


Stuff.


Create a loop.


Finish!


This idea can also be used for gift tags.


HAPPY CRAFTING!!!